Using HiveMQ MQTT Public Broker to Control an I2C LCD from Next.js
11-02-2025 | 2 min read
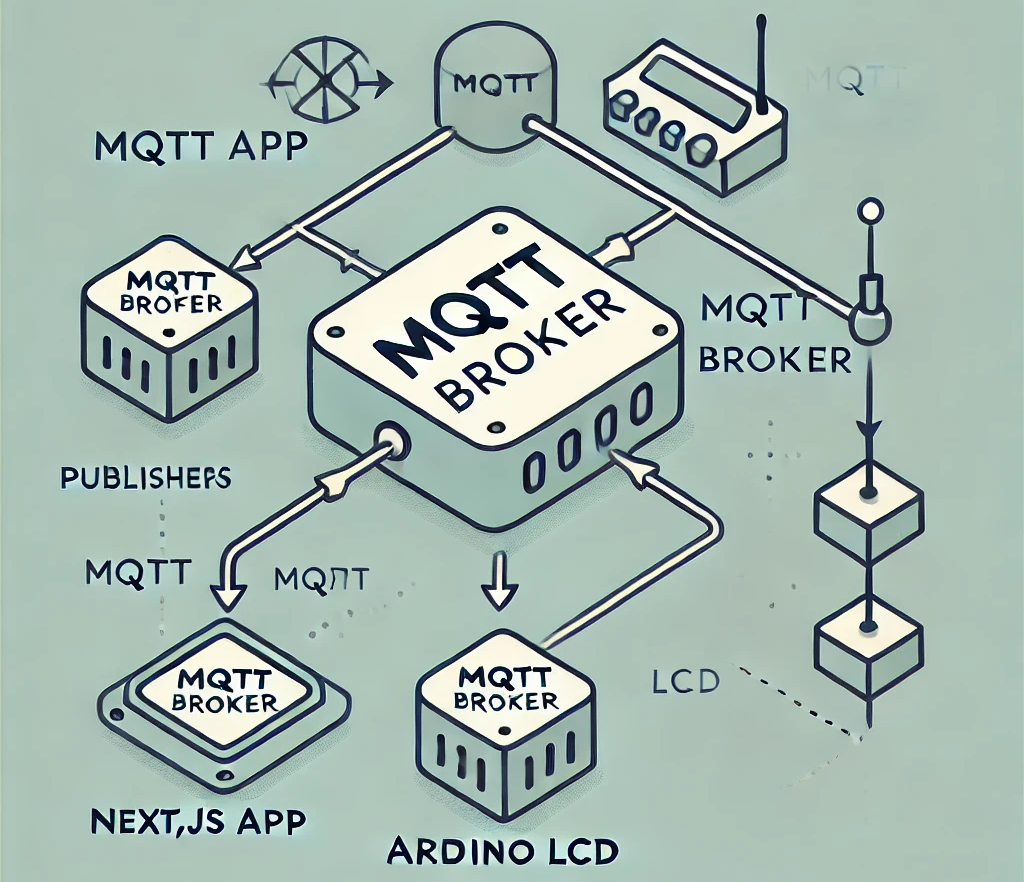
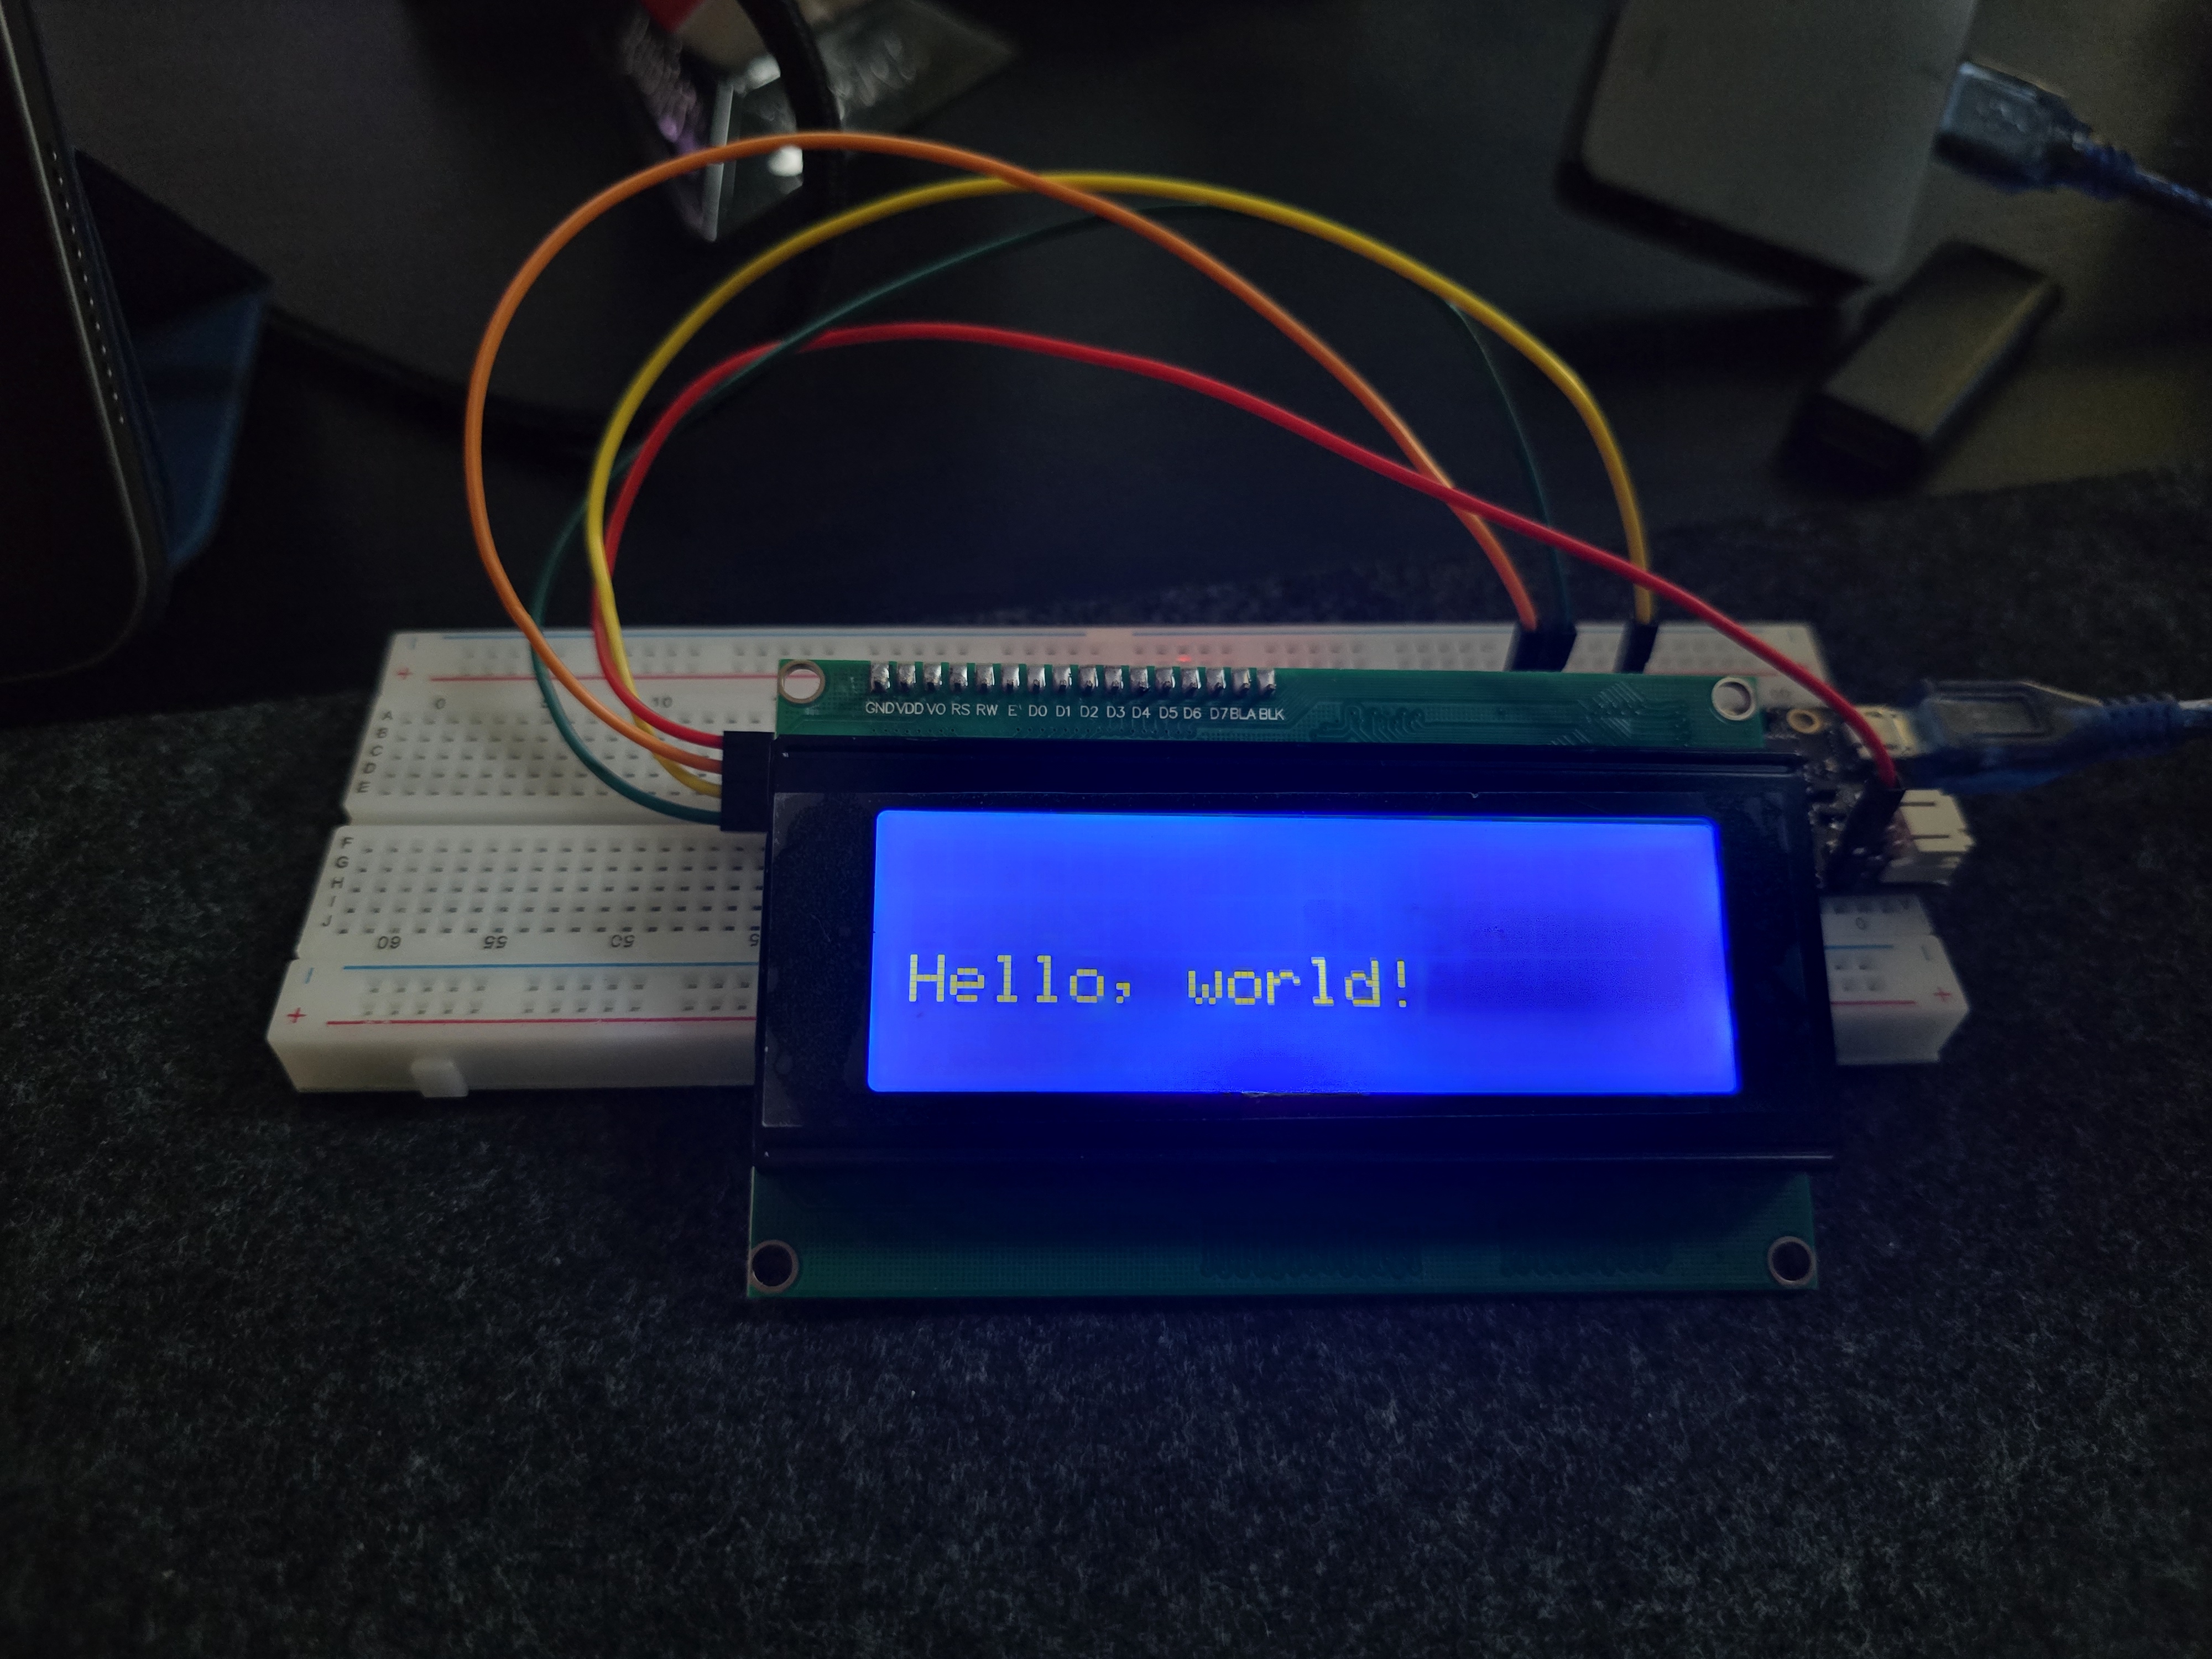
In this project, I used HiveMQ's public MQTT broker to send messages from a Next.js component to an I2C LCD display connected to an Arduino Uno with an Ethernet shield. This setup allows real-time message updates on the LCD using the MQTT protocol.
Understanding Pub/Sub Architecture
The Publish-Subscribe (Pub/Sub) architecture is a messaging pattern where senders (publishers) and receivers (subscribers) communicate through an intermediary called a broker. Publishers send messages to topics, and subscribers listening to those topics receive the messages.
Real-World Examples of Pub/Sub
-
Smart Home Systems: A smart home app can publish commands like "turn on lights" to an MQTT broker, and all subscribed smart devices will act accordingly.
-
Stock Market Feeds: Financial platforms use pub/sub to distribute stock updates in real time to multiple users.
-
Chat Applications: Messaging apps use MQTT to push messages instantly to users subscribed to a particular chat room.
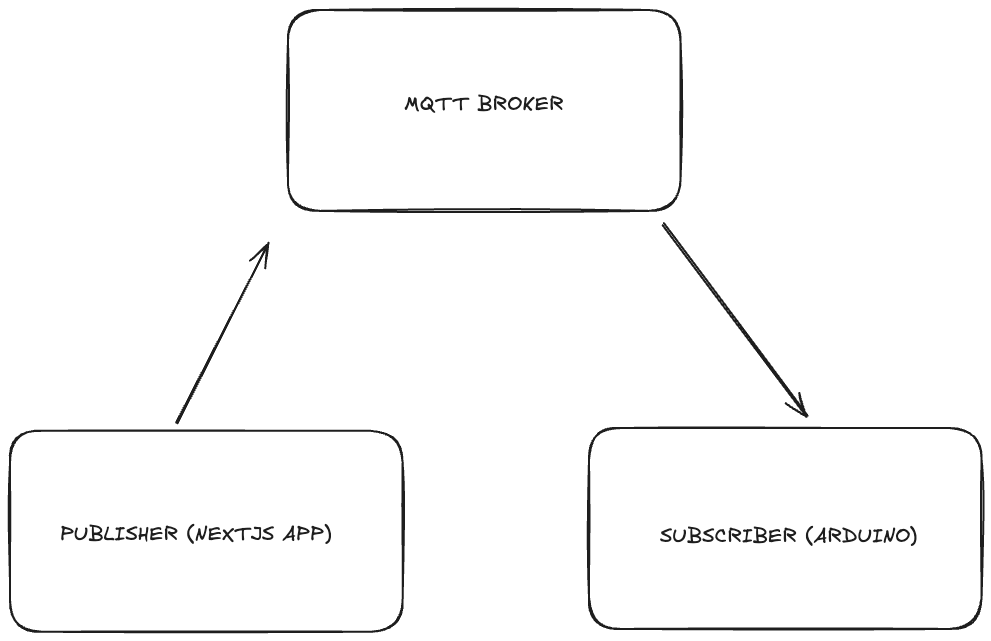
Next.js Component to Publish Messages
In the Next.js app, we send messages to HiveMQ's broker. Here’s the core function responsible for publishing messages:
const sendMessage = async (msg: string) => {
  try {
    const res = await fetch("/api/proxy", {
      method: "POST",
      headers: { "Content-Type": "application/json" },
      body: JSON.stringify({ message: msg }),
    });

    if (!res.ok) throw new Error(`Error: ${res.status}`);
  } catch (error) {
    console.error("Failed to send message", error);
  }
};
This function sends a message to our backend, which then forwards it to HiveMQ’s broker.
Arduino Code to Subscribe and Display Messages
On the Arduino side, the device listens for MQTT messages and displays them on an I2C LCD. The key snippet for handling incoming messages is:
void setup() {
    client.setServer(mqttServer, mqttPort);
    client.setCallback(callback);
    client.subscribe(mqttTopic); // Subscribe to the topic
}

void callback(char* topic, byte* payload, unsigned int length) {
    String message = "";
    for (unsigned int i = 0; i < length; i++) {
        message += (char)payload[i];
    }
    lcd.clear();
    lcd.setCursor(0, 0);
    lcd.print(message.substring(0, 20)); // Display first 20 characters
}
This function extracts the message content and prints it on the LCD display. The setup function ensures that the Arduino subscribes to the correct MQTT topic to receive updates.
Conclusion
By leveraging HiveMQ’s public broker, we achieved real-time communication between a Next.js web app and an Arduino LCD display. This project demonstrates the power of MQTT and pub/sub architecture for IoT applications.
Visit the Micro-controllers page to send me a message and see how it would appear on the I2C screen with the animated demo screen!
Let me know if you have any questions or suggestions!

